Migrating Homelab from VMware ESXi to Proxmox: A New Era

Introduction

For years, VMware ESXi was the foundation of my homelab — stable, dependable, and familiar. Then Broadcom acquired VMware, and the writing was on the wall.

The free ESXi license disappeared. Support for consumer-grade hardware like MiniPCs and NUCs became problematic. The platform that had “just worked” for years was now actively working against the homelab use case.

Enter Proxmox — an open-source virtualization platform built on Debian Linux, offering KVM, LXC, ZFS, and native clustering without a licensing fee.

Building a Scalable Image CDN with MinIO, imgproxy, and Cloudflare

Intro

In today’s digital landscape, efficiently serving images is critical for website performance. Users expect fast-loading, responsive websites, and images often account for the majority of a page’s weight. In this article, I’ll walk you through building a powerful, scalable image CDN using open-source tools that you can deploy in your own infrastructure.

The Architecture

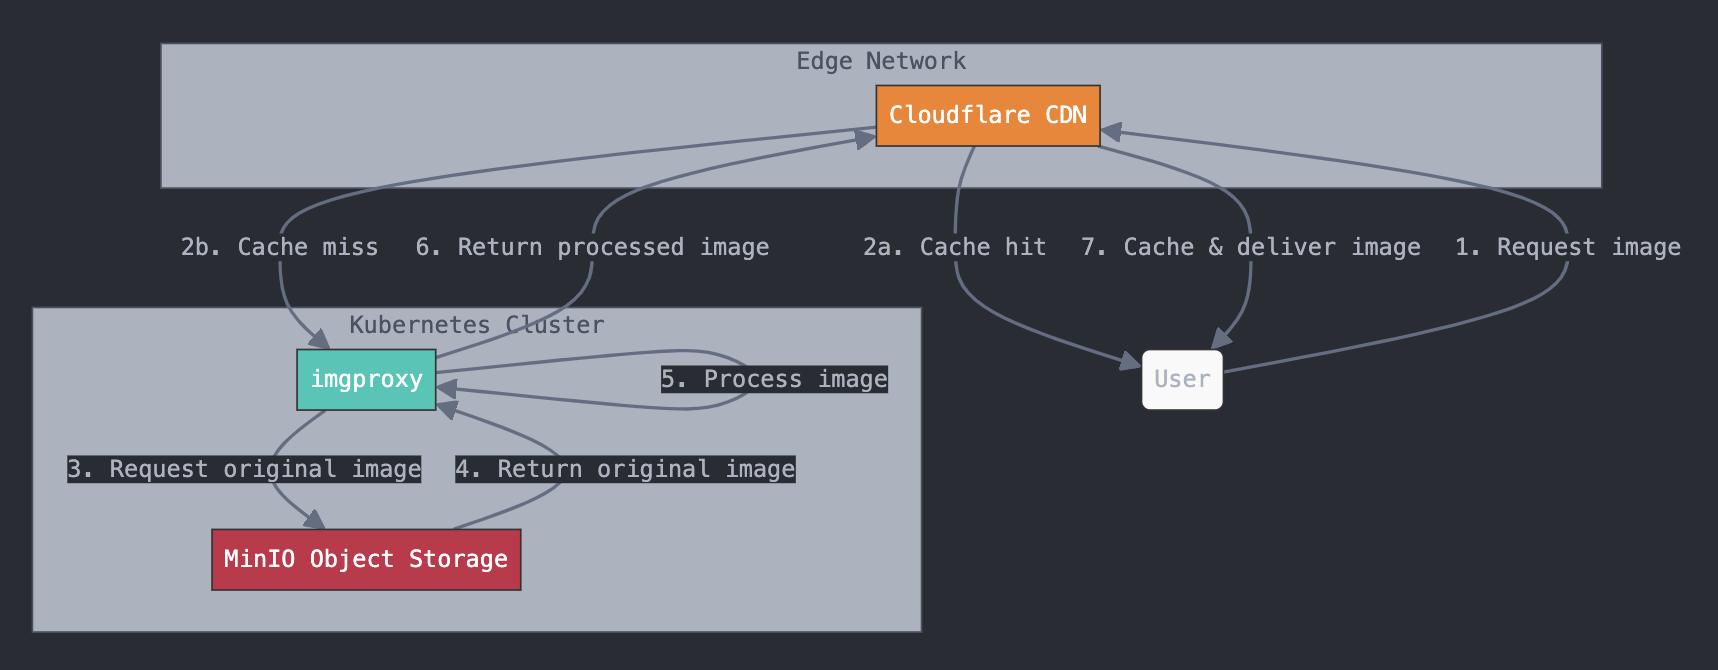
Our image CDN consists of three main components:

  1. MinIO — An S3-compatible object storage backend that stores original images
  2. imgproxy — A fast and secure image processing service that resizes and optimizes images on-the-fly
  3. Cloudflare — Providing CDN capabilities through Cloudflare Tunnel

/images/building-a-scalable-image-cdn-with-minio-imgproxy-and-cloudflare/Screenshot-2025-04-24-at-19.42.20.jpg

Websocket, Cloudflare Tunnel, Apache httpd and a Bit of Security

The Infrastructure Overview

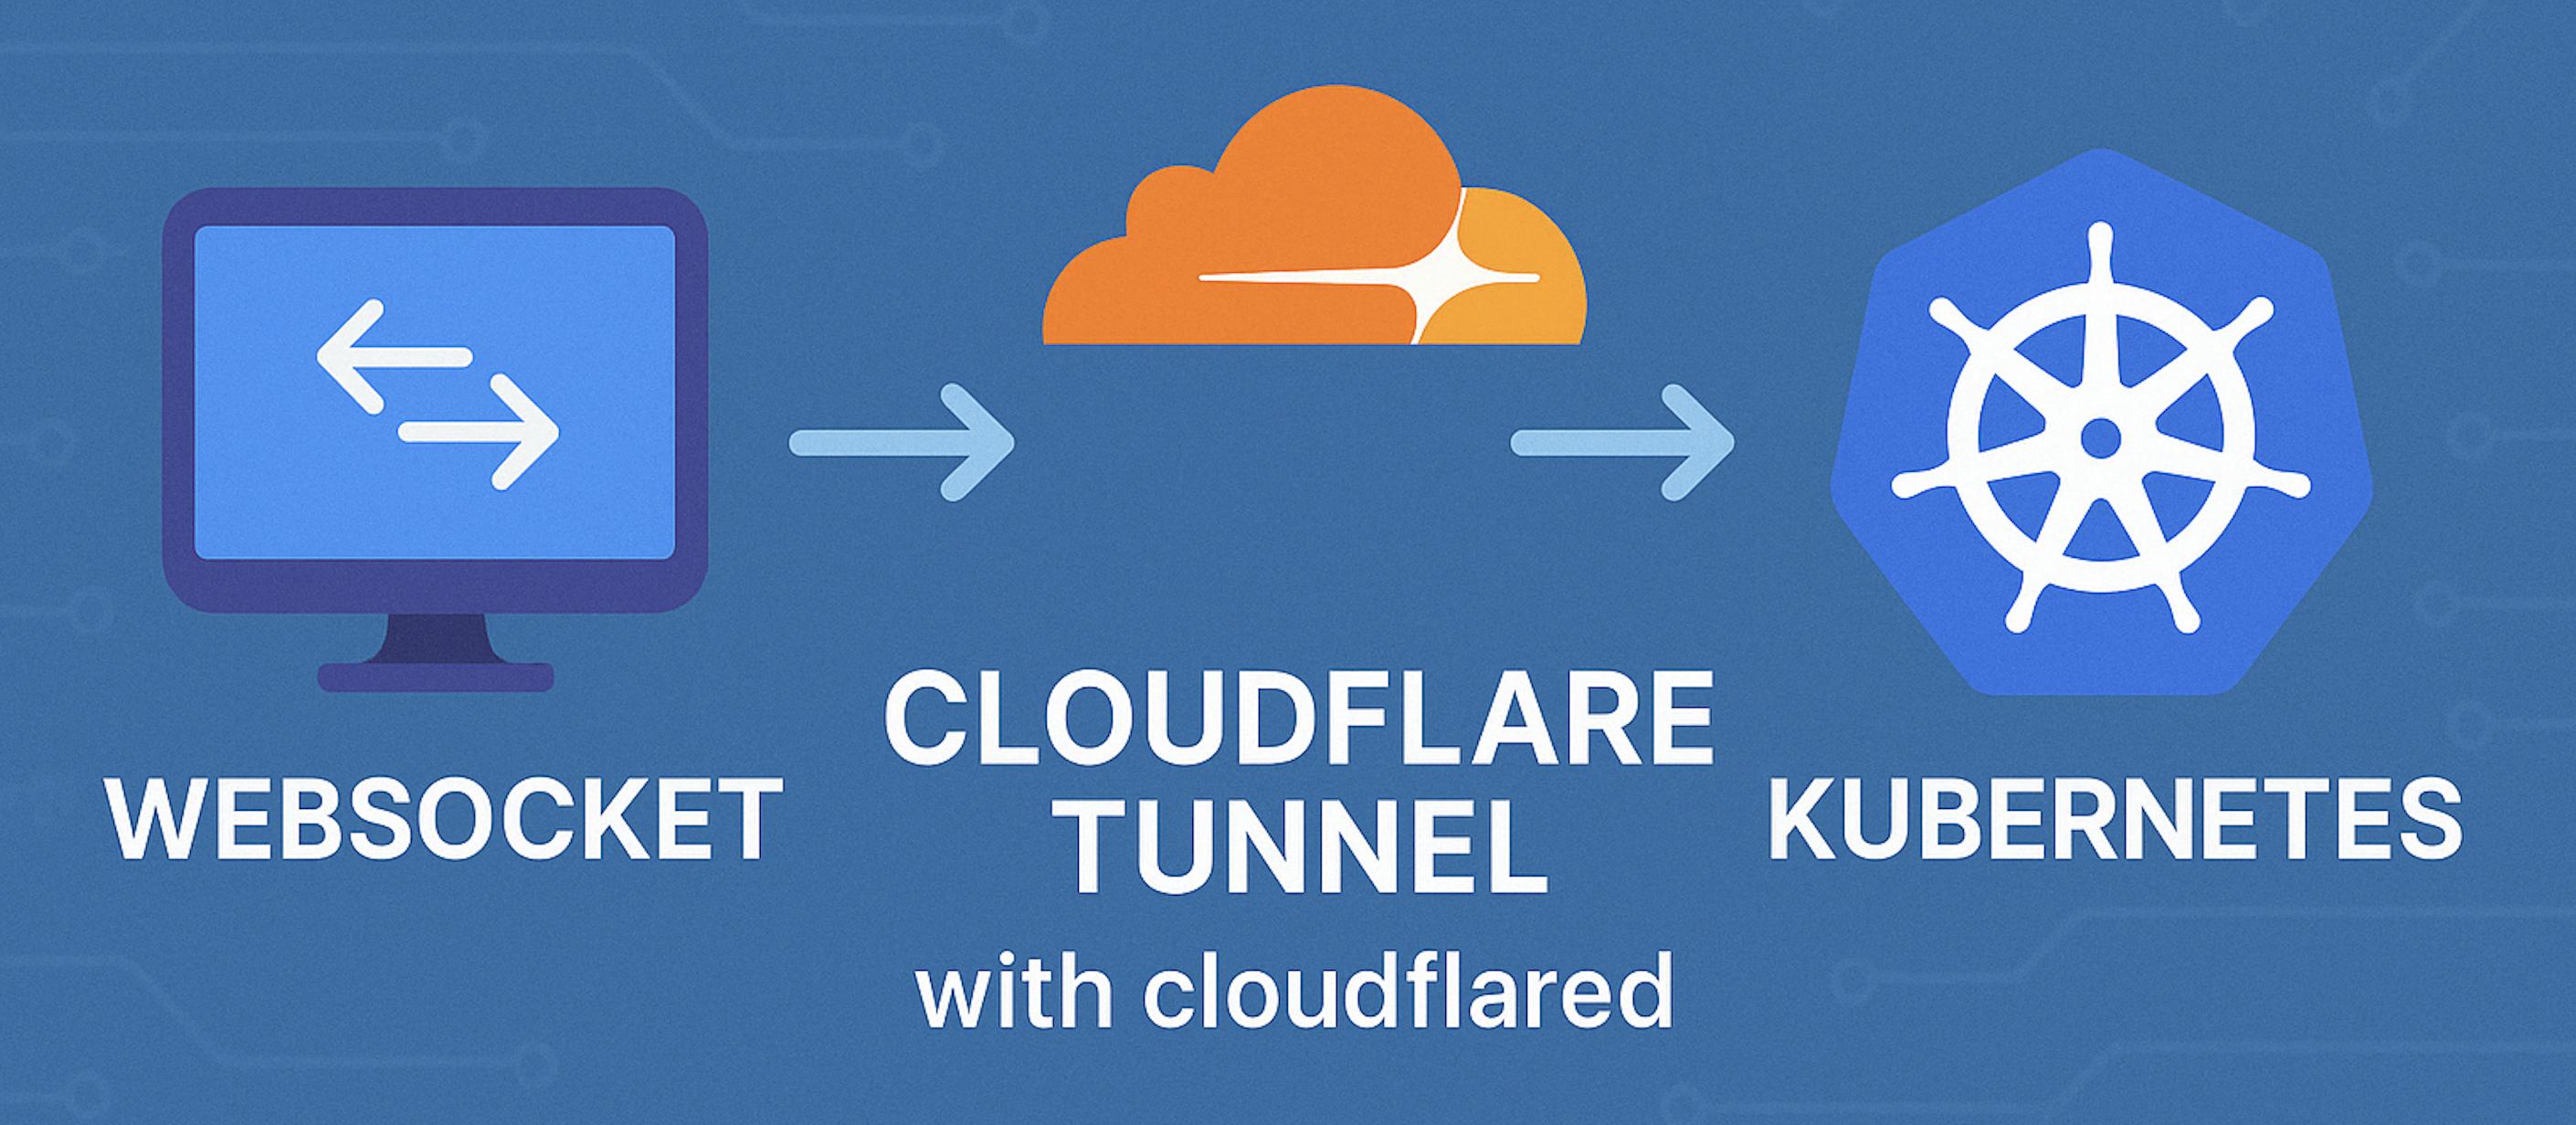
Exposing home lab services to the internet can be both necessary and risky. Traditional methods — port forwarding, VPNs, reverse proxies with open inbound ports — come with their own set of challenges. This is where Cloudflare Tunnel (formerly Argo Tunnel) comes in as an elegant solution.

In this article, I’ll walk you through how I’ve implemented a secure infrastructure using Cloudflare Tunnel with WebSocket support, running on a Kubernetes cluster with Apache HTTPD as a reverse proxy. This setup allows me to securely expose internal services without opening ports on my residential firewall.

HPA vs Rate-limit

INTRO

Strange… we are using HPA to increase availability and introducing rate limiting to reduce it?

Well, let’s create the context.

This analysis is based on specific assumptions:

  • Cloud environment
  • Dynamic infrastructure
  • Minimum resources available

HPA

In Kubernetes, a HorizontalPodAutoscaler automatically updates a workload resource (Deployment, StatefulSet) to match demand.

Patterns

TypeBehaviour
Slow and temporaryDaily fluctuations, peaking during the day and troughing at night
Rapid and temporaryShort bursts from poorly-behaved downstream services
Slow and persistentRequest volume slowly increases as the product sees adoption
Rapid and persistentAbrupt shift from low to high volumes — e.g. called by batch jobs

Ideal Practice

TypeIdeal Practice
Slow and temporaryHPA should add and remove pods as necessary
Rapid and temporaryHPA should NOT modify pod count — leave headroom for brief spikes
Slow and persistentHPA should add and remove pods as necessary
Rapid and persistentLeave headroom; HPA adds pods quickly to restore target utilization

Rate Limit

A rate limit is the number of API calls an app or user can make within a given time period. If this limit is exceeded — or if CPU or time limits are exceeded — the app may be throttled. Throttled requests fail.

Application Rate Limit

I needed to implement rate limiting within an application for reasons I’ll get into in a follow-up post. When you start thinking about this, you basically have two paths:

  1. Logic embedded directly in the application code
  2. A sidecar container that handles the rate limiting role

Both work. Both have trade-offs. Let me go through each one.

The Code Way

This is the simpler approach on the surface, but it comes with some annoying limitations. It can only be reused for applications in the same programming language. And adding rate limiting logic inside the application creates a secondary role — meaning the request interceptor will consume CPU and may produce false metrics if you’re not tracking it carefully.

YA VPN Service in Kubernetes

Why

I had my beloved IPsec setup based on strongswan running in Kubernetes for a while — you can read about that here. It worked fine. I wasn’t looking to change it. Then a colleague pointed out WireGuard’s overhead numbers and I got curious enough to evaluate it myself.

WireGuard is a modern VPN protocol that lives in the Linux kernel. It’s designed to be simple, fast, and have a minimal attack surface compared to IPsec or OpenVPN. The numbers people throw around are impressive, but I wanted to see them in practice.

Lazy People Do It Better

/images/lazy-people-do-it-better/Screenshot-2022-02-21-at-16.32.46.jpg

There’s a reactive way to manage infrastructure and there’s a proactive way. The reactive way is: traffic increases, you notice the service is suffering, you add resources. The proactive way is: you understand your system well enough that it handles demand changes automatically, without you needing to be in the loop.

I prefer the lazy way.

/images/lazy-people-do-it-better/lazy.gif

Kubernetes nstats

/images/kubernetes-nstats/Screenshot-2021-02-22-at-18.16.33.jpg

Here we go… another weird sidecar container.

Motivations

I’ve always been interested in the observability area. There are many aspects that improve performances and fix bugs. One of the most interesting is network usage.

This is not about network issues:

/images/kubernetes-nstats/networkissue.jpg

It’s about understanding where bandwidth is actually going.

You’re probably used to seeing something like this for your VMs:

Homelab, When Small is Big

/images/homelab-when-small-is-big/Screenshot-2021-02-19-at-18.06.38.jpg

When I first got into IT, devices ran continuously. My first lab was an impressive tower from 1999 with substantial disk and memory banks, a quality CPU cooled by a massive copper heatsink and a 12cm fan. During the night, those components produced noise comparable to a helicopter. Neighbors complained. I didn’t sleep well.

The lab evolved over the years. Not just for noise reasons, but prioritizing cost-effective hardware that could replicate a simplified production environment. The goals today are very different from 1999:

Ambient Sensor for Mere Mortal

/images/ambient-sensor-for-mere-mortal/Screenshot-2021-01-24-at-21.39.16.jpg

In the home automation era, I wanted to understand how simple thermal sensors actually work — not just buy a commercial solution and plug it in, but build the whole thing from scratch. Here’s what I put together.

What We Need

  • ESP8266
  • DHT22
  • USB power supply
  • InfluxDB
  • Grafana

Hardware

I initially considered Arduino but followed a colleague’s suggestion to use NodeMCU instead. NodeMCU is an open source platform developed for IoT where you can compile firmware with the sensors you need. Its primary advantage is Lua support, which is significantly simpler than Arduino’s C implementation for this kind of work.